Adding FuseDesk’s Live Chat for Keap and Infusionsoft to your WordPress site can be done in a few easy steps.
The easiest way is with our free WordPress Plugin. The instructions below are if you don’t have our plugin installed.
Finding Your Live Chat Embed Code
The first step is getting your Live Chat embed code.
- Login to your FuseDesk App and click Chat Settings under Settings
- Click the green Live Chat + button
- Configure your chat widget and settings
- Copy the script up top to you clipboard
Adding Live Chat Script to WordPress
Now that you have your embed code, you’ll want to get it setup in WordPress. How to do this varies greatly depending on what theme you have or what plugins you have installed.
The first step will always be to login to your WordPress site.
Live Chat with Genesis Theme for WordPress
- In WordPress, navigate on the sidebar to Genesis, and then Theme Settings.
- Scroll down to the Header and Footer Scripts
- Paste you live chat embed code from above into the wp_head box (below anything else that might be in the box)
- Click Save
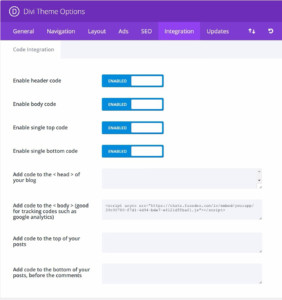
Live Chat with Divi Theme for WordPress
- In WordPress, navigate on the sidebar to Divi and then Divi Theme Options
- Click on the Integration tab
- Scroll down to the “Add code to the < body > (good for tracking codes such as google analytics)”
- Paste you live chat embed code from above into the box (below anything else that might be in the box)
- Click Save
Live Chat with Other WordPress Themes
If you have another WordPress theme, you’ll generally want to go to the place in the theme options where you configure what scripts you embed, like Google Analytics, Keap’s tracking pixel, and so on. Paste in the embed code from above and save.
You may find it easier to instead use our WordPress Plugin or setup Google Tag Manager on your site to make managing embed codes like this easier in the future.