In FuseDesk, you can easily automate multi-step workflows by leveraging FuseDesk Automations.
Your FuseDesk Automations for Workflows will typically be triggered by your team applying a FuseDesk Case Tag, replying with a specific Email Template, or using a specific Note Template.
Let’s say that your team gets work orders for website change orders. A new case will come into FuseDesk, perhaps from a contact form, or FuseDesk New Case Form.
Your team then tasks the case to the right team member and the work begins.
Starting a Work Flow
When your team starts the website change order, they apply a Work Started Case Tag.
Your Automation can then send an email template notifying the customer that work has begun and that you’ll follow up with any questions. Your team gets started on the tasks.
When they’re finished, they reply back with a work completed template and modify the reply with the details of the tasks completed.
This kicks off an Automation to remove the Work Started Case Tag and apply a Work Completed Case Tag and Change the Case Status to Closed.
It might look like this:

Multi-Step Work Flow Automation
If you had a multi-step workflow, you could insert a step in between. For example, if you wanted all work orders to be reviewed by a manager, you could add a Note Template Automation.
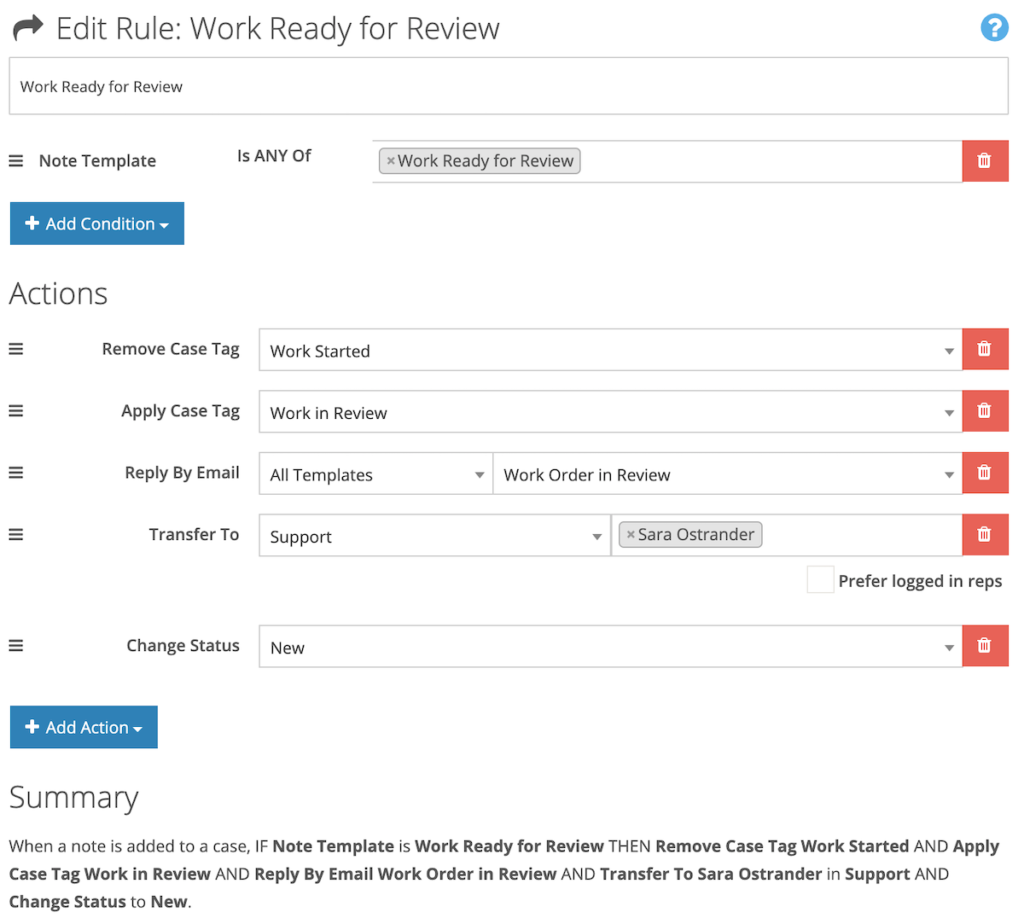
When a Note Template is used for wrap up, the case status will be changed to New, the Case will be transferred to a Manager, an email will be sent to the customer notifying them of the change, the Work Started Case Tag will be removed, and a Work in Review Case Tag will be applied.
Your Automation might look like this:
In Summary
In these examples, you saw how we can kick off FuseDesk Automation for workflow automation using any number of triggers from Case Tags being applied, to Email Templates being used in replies, to Note Templates being used to log work on a ticket.