If you use Gravity Forms on your WordPress site, you can easily create new FuseDesk cases from your form submissions.
To get started, install our free WordPress plugin.
With your FuseDesk plugin installed, activated, and configured, you’ll then have a new option on your forms!
From the sidebar in WordPress, click Forms. Then choose Forms to modify an existing form or New Form to create a new Gravity Form.
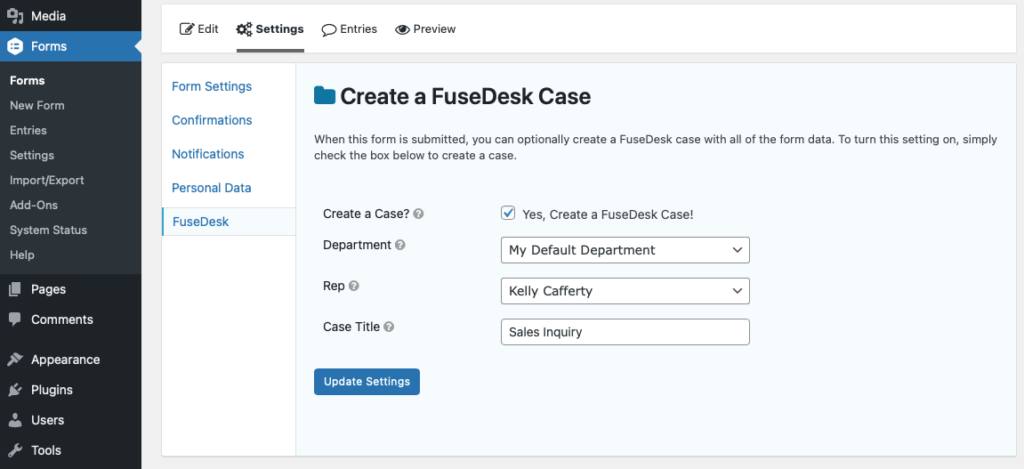
From your form settings, click on FuseDesk and check the box to Create a Case when the form is submitted.
Then choose your department, optional rep, and optional case title.
Advanced Gravity Forms Options for Creating a FuseDesk Case
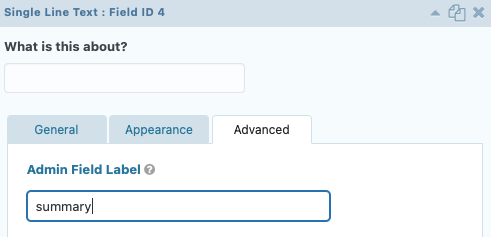
If you want to get really advanced with your case creation, you can set a form field’s Admin Field Label to one of the following and FuseDesk will use the value of that field when creating the case:
summary: The summary/title for your FuseDesk Casedepid: The FuseDesk department ID to assign the case torepid: The FuseDesk rep User ID to assign the case toemail: The email address to link the case toopenedby: The full name of who opened this case (i.e. the customer’s name)casetags: A CSV of FuseDesk case tag IDs or tag names to assign to the case
If a user is logged in, we’ll automatically use their name, email, and CRM contact ID for the new FuseDesk case. If they’re not logged in, we’ll use the email address that they enter.
When a form is submitted with FuseDesk case creation enabled, we’ll record the result of creating the case right on the form Entry in Gravity Forms.
Viewing Gravity Forms Submissions – and FuseDesk Cases Created
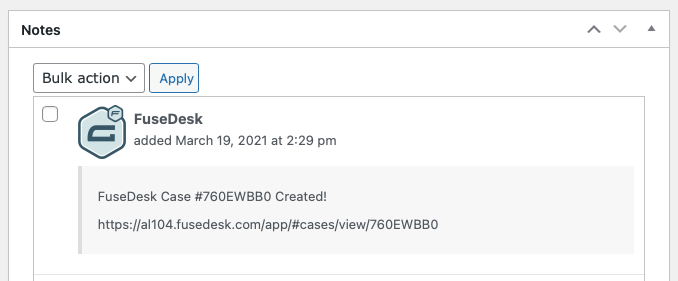
From within WordPress, click on Forms in your sidebar navigation and then choose Entries.
Click into an Entry and scroll down to Notes at the bottom.
You’ll see an entry from FuseDesk with the case number as well as a link to the case.
If there was an error creating the FuseDesk case, you’ll see the error details instead.