If you’d like to use Amazon SES to send your outbound help desk emails from FuseDesk you can easily set that up.
Note that sending email via Amazon SES requires a FuseDesk Enterprise Plan.
Head to Settings and then Outbound Emailing.
Select Amazon SES from the list and enter your credentials.
You’ll need your Amazon SES SMTP Username and Password, your AWS Region, and an Approved Sender.
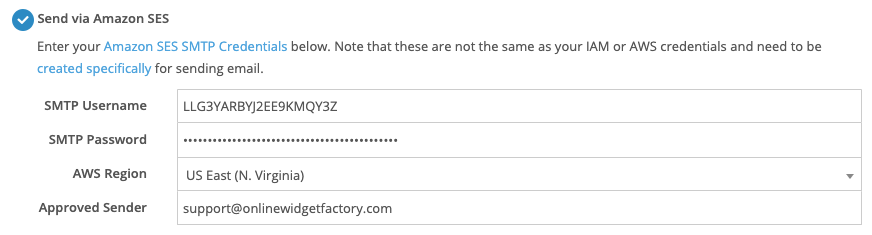
Note that your Amazon SES SMTP Credentials are not the same as your IAM or AWS credentials and need to be created specifically for sending email.
Your AWS Region can be found in the top right of your AWS Console when you’re creating your SES SMTP Credentials.
Your Approved Sender needs to be a Verified Identity with SES. This is typically either a verified email address or an email address on a verified domain that can send via your SES account.
Once you’ve finished entering your details, click Save and we’ll send a test email to validate your settings are correct.
If we’re able to successfully send a test email from FuseDesk with your credentials, you’re all set!
If we’re unable to send a test email, an error message will be shown that can help you to fix your configuration.
Common Amazon SES Configuration Errors
- Make sure that you’ve selected the right AWS Region and that your Region matches where your credentials were created.
- Assure that you’ve entered an Approved Sender that you’ve verified with SES
- Check that you’re using your SES SMTP Credentials – and not IAM or AWS credentials
Updating Your FuseDesk Templates
Your outbound email templates in FuseDesk must all have a from address that matches one of your Verified Identities above.
If you try and send an email from FuseDesk from an email address that isn’t verified with SES, the email will fail to send.