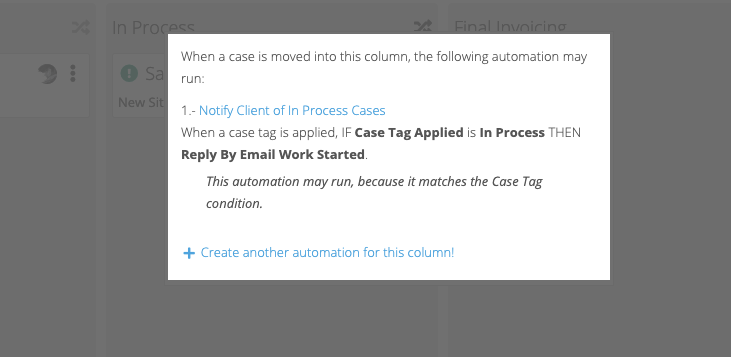
As you move cases between columns in FuseDesk Workflows, you can configure Automations to run.
At the top right of each column you may find an Automation icon.
Hover over the Automation icon to see what Automations may already run for cases as they enter the column.

You can also typically choose to create a New Automation using the link at the bottom of the list of Automations already configured.
After clicking the link, enter in a Name for your Automation, for example “Proposal Approved”, “Work Ready for Review”, “Sale Closed”, etc…

Then, enter any additional Automation Conditions that you’d like to apply and then configure your Automation Actions.
Click to Save And Enable your new Automation and the next time you move a case into that column, your Automation can run on the case!
Workflow Automation Ideas
What kinds of Automations might you want in your Workflows? Here are just a few ideas:
- When a prospect case moves from the New Lead column to the Left Voicemail column, automatically add a note to the case about the voicemail and send a follow up email letting the prospect know that you’ve left them a voicemail and the reason for your call.
- When a work order case moves from the To Do column to the In Process column, automatically send an email to the client letting them know that you’ve started working on their project.
- When a writing project moves from the Editorial Review column to the Client Review column, automatically notify the client that the project is ready for their review and transfer the case to the contact’s owner.
- When a case moves from the Sales department to the Onboarding department, transfer the case to Candice, apply the Won case tag, send a welcome email, and tag the client in your CRM.
- When a case is marked as Closed and it has the VIP case tag, send a VIP follow up email from the business owner to the contact thanking them, tag the case as VIP follow up sent, and tag the client in your CRM.
