Using ActiveCampaign, you can easily create a new FuseDesk case.
First, in ActiveCampaign, head into Automations and then click Edit on an existing automation (or Create an Automation) where you want to create a new FuseDesk Case.
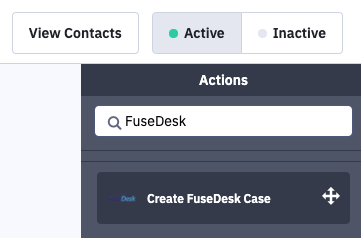
Setup your triggers how you like, and then on the righthand side under Actions search for FuseDesk and click on Create FuseDesk Case.
Drag the Create FuseDesk Case block into your Automation to where you’d like the case created.
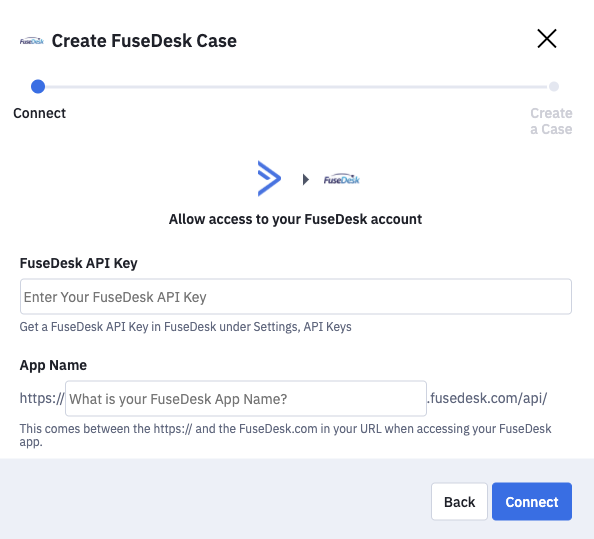
Next, click on + Connect New Account.
If you’ve already connected to FuseDesk before, click Select on your existing app name and skip connecting a new account.
To add a new FuseDesk account, you’ll want to enter your FuseDesk API Key and FuseDesk App Name.
With your FuseDesk app added and selected, you can now configure your new case!
Select a Department, optional Rep, Case Title, Case Description, and optional Case Tags.
For your case Title and Case Description you can even “personalize” the text with Active Campaign merge fields!

Click Finish and you’re done!
Now, when a contact is added to this automation or triggers one of your configured triggers, a new FuseDesk will be created directly from ActiveCampaign.