You can easily use FuseDesk Workflows to create a Sales Pipeline for your team in just a few quick steps.
Head to Workflows and click the Plus button to create a New Workflow.
Name your Workflow something like “Sales Pipeline”.
For Column Field choose Case Tags.
For View Filter you’ll likely only want the Status as Active and perhaps some additional filters like by Department or Case Tag.
You can leave Sorting as Last Responded To and Sharing as Everyone.
Under Columns, let’s create some case tags for each of the steps in your sales pipeline.
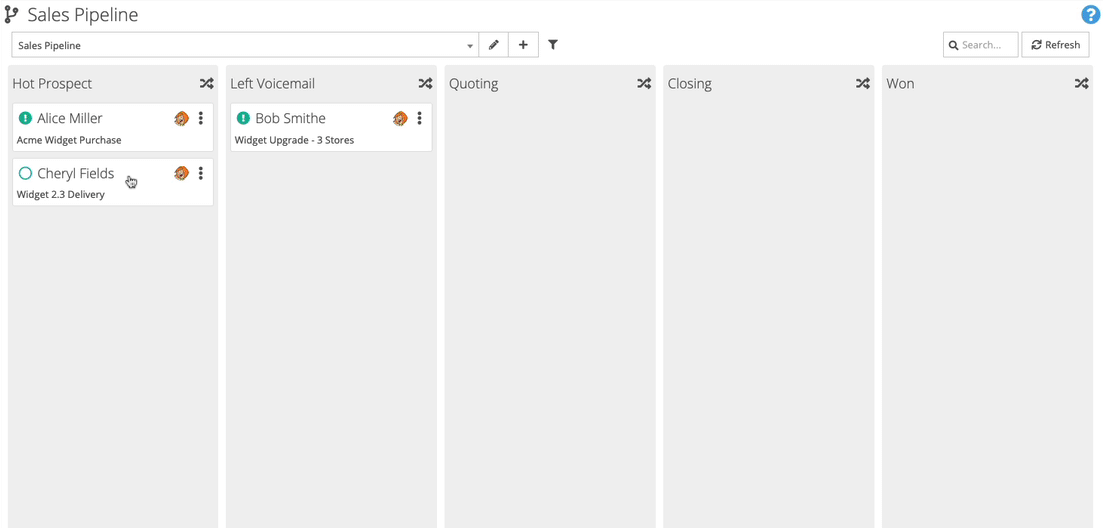
Perhaps you’ll want tags like “New Prospect”, “Left Voicemail”, “Quoting”, “Closing”, and “Won”
You can easily add new tags, remove tags, or drag and drop your tags to rearrange them.
Click Save and enjoy seeing your sales cases now organized in a Sales Pipeline with your newly formed case tags!
Simply click and drag your cases between columns as you move them forward through your pipeline!

Sales Pipeline Automations
If you’d like, you can now add workflow automations in FuseDesk to help your team work more efficiently.
For example, you might create Automations so that:
- When one of your sales reps drags a case into the Left Voicemail column, automatically send a follow up email saying that a voicemail was left and the reason for the call, and ask for a call back.
- When your sales team responds to a case using your Quote Attached email template, automatically move the case to Closing.
- When your sales team uses the note template “Lost Prospect – Not a Good Fit”, close the case, removing it from the board.
- When a sales case is moved into the Won column, automatically tag the contact in your CRM as a Customer, notify your team on Slack, and send the customer a welcome email.